coast defense

Masthead Image

Battery Ward

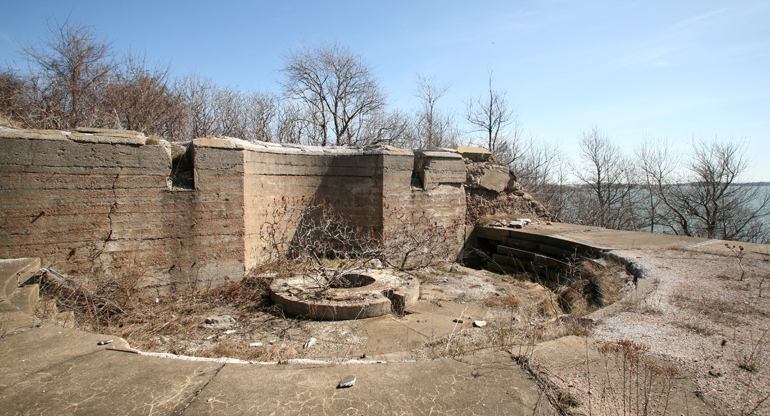
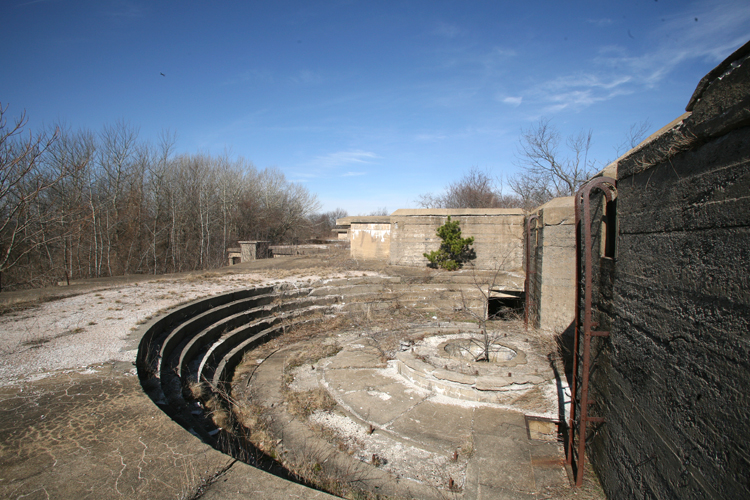
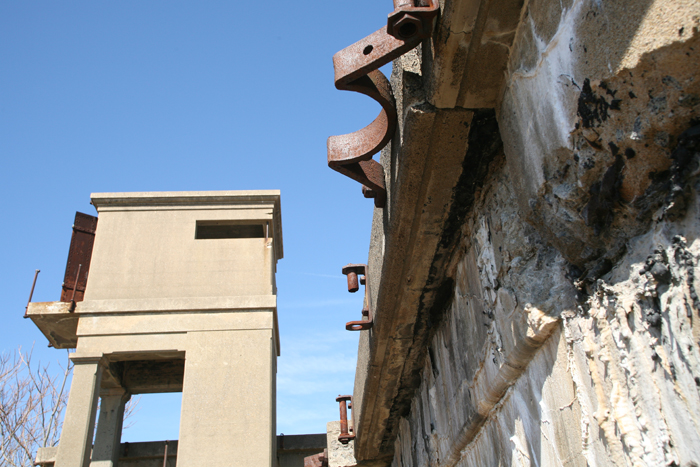
Battery Ward was designed to mount two 10-inch guns, M1888 M1, on disappearing carriages, M1894. Like Battery Hitchcock to its left, this battery was also completed in 1899, giving Fort Strong a continuous line of five 10-inch weapons, which were intended to engage enemy ships beyond the range at which they could shell downtown Boston. Battery Ward's guns could cover all northern approaches to the harbor and could reach north out as far as East Point in Nahant or south to Nantasket Beach in Hull.

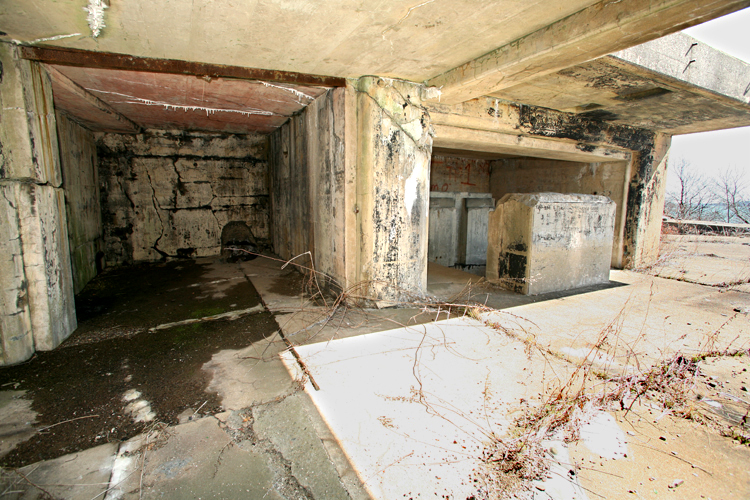
Taylor-Raymond shell hoists were not original the battery, but were added to each gun's magazine in 1906. Installation of the 25 KW generator room was accomplished in 1918, lagging behind Battery Hitchcock by a couple of years,

Again, records indicate that at least one of the guns of the battery (Gun 2) was fired 134 times during its life--about the same level of activity as was reported for Gun 2 at Battery Hitchcock.

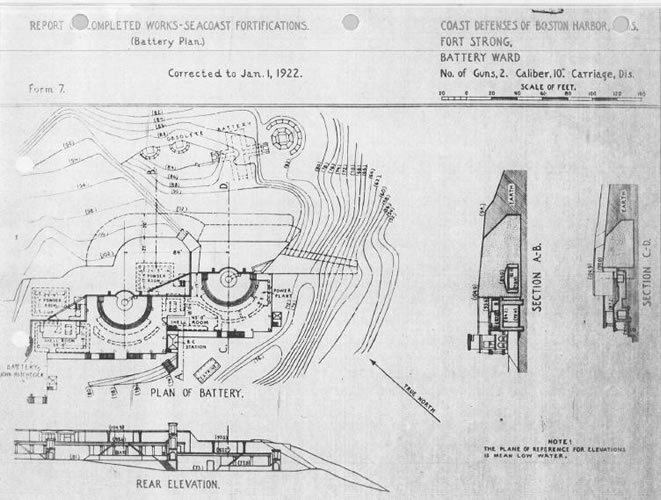
Slide 1 of the second gallery at left shows an interesting oddity--the "OBSELETE BATTERY" indicated on the plan, about 80 ft. northeast of the burster slab of Battery Ward, Gun 1. This is an old smoothbore cannon battery that was emplaced on these heights before the Civil War. The author has not yet bushwacked through the thick, thorny undergrowth to confirm the present status of the remains of this fomer battery.


Battery Ward Photos

  • Ward Gun1 Looking NE
    Photo looks NE across the gun pit for Gun 1. This gun position appears to be the most decrepit of any in the fort. Note the collapse of the retaining wall at right rear. This is the most easterly gun position, with the channel and Ft. Revere in the distance beyond the trees. (PG 2010)
  • Ward Gun1 Ammo Delivery
    This pair of shelters is similar to others at the fort. The hole drilled through the platform at the right rear of the left-hand shelter used to house a powder hoist that went down to the magazine. The concrete "counter" in the righ-hand shelter was the shell delivery table for the hoist that was installed behind it. (PG 2010)
  • Ward Gun2 Looking W
    This view looks west along the face of the parapet. The tall Battery Commander's station is behind the camera to the left. (PG 2010)
  • Ward-Gun2 Ammo Delivery
    The platform for Gun 1 lies beyond the Battary Commander's tower, and it (along with its ammunition shelters and the power plant) is at a lower level than for Gun 2. (PG 2010)
  • Ward BC Stn, Looks W
    The second level of this tower is tall enough to command Gun 2, while the third level can see across the parapet. Photo is taken from the gallery level walkway at the extreme east end of the emplacement. Note the open armored steel door on the top level of the tower and the remaining traces of old shell pulley hoists at right; these served ammunition from the lower magazine level up to the gun platforms. (PG 2010)
  • Crane Bracket-Top
    The semi-circular iron bracket used to hold the column of a davot hoist that was used to raise shells by block and tackle from the magazine up to the firing platforms. In later days, this became a backup system for the powered shell hoists. (PG 2010)
  • Crane Foot Socket
    The foot of the crane hoist standard was locked into this socket. (PG 2010)